Go to Target for fun "FREE" Christmas music.
Wednesday, December 22, 2010
Wednesday, November 24, 2010
This is how I'm starting Thanksgiving off.
I cant get enough of these funny girls! I went and got some expresso vodka today. I cant think of anything better then vodka and expresso. Yum Yum!!!
Tuesday, November 23, 2010
DIY Booties
I almost got rid of these boots because I never wore them. I have been seeing short boots or booties everywhere. This was really easy to do. I love them even more the second time around.
 |
| Before |
 |
| Place a pin to mark where you want to cut. Cut about an inch higher to allow for seem . |
 |
| Cut off where you marked. Then use the extra piece to measure where to cut on other boot. |
 |
| Fold over and pin where your seem will be. I used a zigzag stitch so they would stretch easier. |
 |
| Done! |
Thursday, November 18, 2010
Wednesday, November 17, 2010
Tuesday, November 16, 2010
Monday, November 15, 2010
Make Your Own Napkins
I needed some cloth napkins today. I found some fabric I had lying around and made 6 napkins out of 1 ½ yards of 45” wide fabric. If you have 60” wide fabric you only need about 1 yard.
You will need:
-Fabric
-Measuring tape
-Sewing machine
-Iron
 |
Cut out 17” squares. |
 |
Fold over about ¼” and iron down. Then repeat one more time so there is no raw edge. |
 |
Sew the edges. |
 |
| When done make sure to iron flat. |
 |
| Done. |
Note: I felt like these where a little on the small side when I was finished. Next time I will make them bigger.
Saturday, November 13, 2010
Zebra baby!
I needed some animal print to go with my costume for Halloween this year. I took a pair of white earrings that have been sitting around from a previous Halloween costume and a magic marker.
 |
| Use the maker to make random lines. |
 |
| Keep filling in. |
 |
| Your done! |
Friday, November 12, 2010
Wednesday, November 10, 2010
Etiquette
Every Wednesday I will be posting something new about etiquette. This is an attempt to teach my son (and me) proper etiquette. I’m going to do a dinner on Wednesday nights to practice what we have learned.
Today lets start with how to set a formal table.

Here's the Silverware and dinnerware rule:
Use the silverware farthest from your plate first. Eat to your left, drink to your right. Any food dish to the left is yours, and any glass to the right is yours.
Starting with the knife, fork, or spoon that is farthest from your plate, work your way in, using one utensil for each course. The salad fork is on your outermost left, followed by your dinner fork. Your soup spoon is on your outermost right, followed by your beverage spoon, salad knife and dinner knife. Your dessert spoon and fork are above your plate or brought out with dessert. Just remember the rule to work from the outside in. Use one of two methods when using the fork and knife:
American Style: Knife in right hand, fork in left hand holding food. After a few bite-sized pieces of food are cut, place knife on edge of plate with blades facing in. Eat food by switching fork to right hand (unless you are left handed). A left hand, arm or elbow on the table is bad manners.
Continental/European Style: Knife in right hand, fork in left hand. Eat food with fork still in left hand. The difference is that you don't switch hands-you eat with your fork in your left hand, with the prongs curving downward. Both utensils are kept in your hands with the tines pointed down throughout the entire eating process. If you take a drink, you do not just put your knife down, you put both utensils down into the resting position: cross the fork over the knife.
Once used, your utensils, including the handles, must not touch the table again. Always rest forks, knives, and spoons on the side of your plate or in the bowl.
For more formal dinners, from course to course, your tableware will be taken away and replaced as needed.
To signal that your are done with the course, rest your fork, tines up, and knife blade in, with the handles resting at five o'clock an tips pointing to ten o'clock on your plate.
Any unused silverware is simply left on the table.
Wednesday, October 20, 2010
Tuesday, October 19, 2010
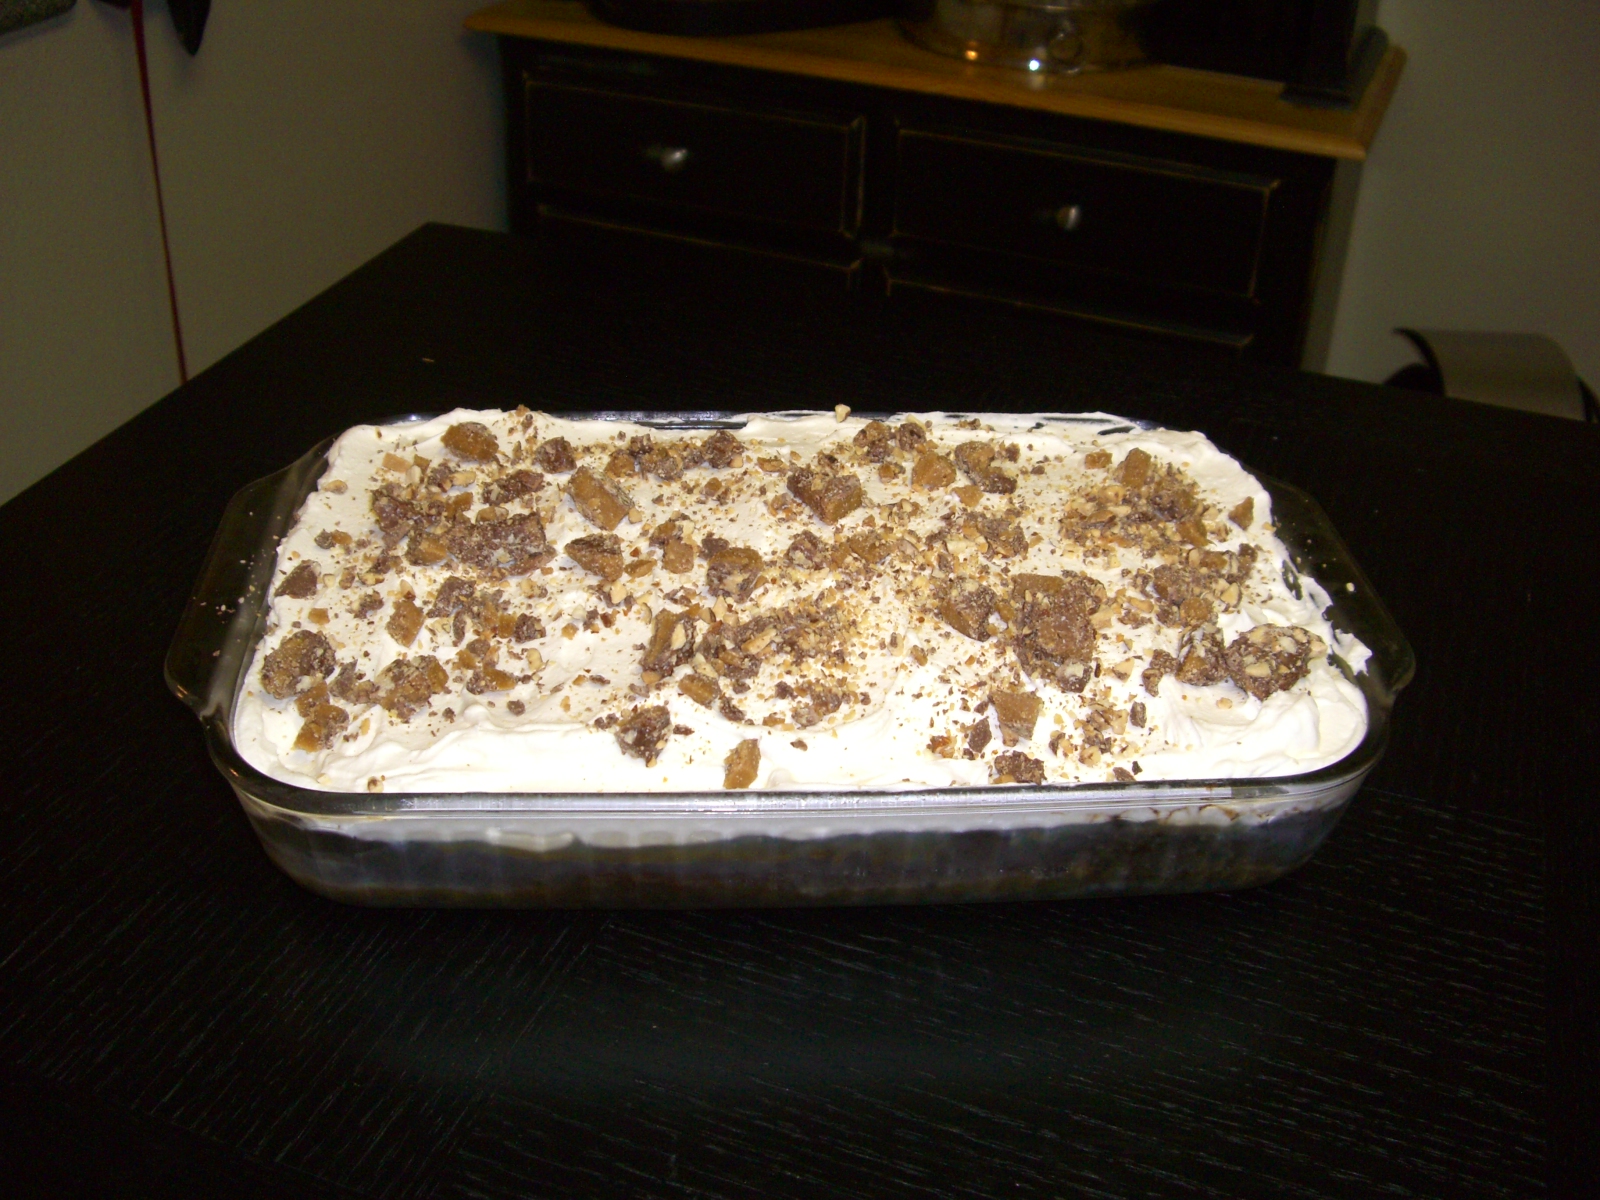
Better then Sex Cake!!!
This is the best cake ever. You will be addicted after you make it. Let me know if its “better then SEX” in your opinion.
Ingredients needed:
-Chocolate cake mix
-Sweetened condensed milk
-Caramel topping
-Whipping cream 1pint
-Heath toffee bar

Make cake mix according to directions. After cake is cooked pull it out of the oven and make holes on top using a fork.

Do this why it’s still warm so the caramel and sweetened condensed milk will seep into it. Take the lid of the caramel and heat in microwave 30 to 60 seconds. Poor all over cake evenly. Use a spoon to spread it evenly on top. Once it has all seeped into the cake then its time to do the same with the sweetened condensed milk.

Let cool for a few hours. I like to put it in the refrigerator after it has cooled around an hour or so and chill it. When it has chilled for a couple hours pull it out of refrigerator. Whip the whipping cream in a bowl until supper stiff, about the consistency of frosting. DO NOT add any sugar or vanilla to the whipping cream. It will make the cake way too sweat. Spread it on top cake.

Take the toffee bar and place it in a zip lock baggie. Take anything heavy (I use a rolling pin) and break up the toffee bar into pieces. Sprinkle toffee pieces over the whipping cream on the cake.

You’re done! Enjoy the yummy chocolate goodness :)

Thursday, August 26, 2010
DIY Tutu

I made my friend and her doggie matching tutus. Super easy and fun. You will need:
-3 to 4 rolls of tulle
-1 to 2 yards of ribbon
-Scissors
-3 to 4 rolls of tulle
-1 to 2 yards of ribbon
-Scissors
Start by cutting the length of ribbon you need. Decide this by tying it around your waist for width. Make sure to leave enough to tie a bow and make it secure(around 18-24” on each side). Cut a bunch of strips of tulle. I made mine about 24" long. They will be half the length when done. Measure in about 18-24 inches on the ribbon. This should be your starting point. I made a knot in the ribbon so the tulle would not slide around. Start tying tulle on to the ribbon.
 |
| Tying tulle on ribbon |
 |
| Part way there |
 |
| Finished! |
Subscribe to:
Posts (Atom)